Slow-motion recording mode on the iPhone makes it simple to utilize the special effects. This process needed expensive video recording equipment only a few years ago. But what if you want to accelerate rather than slow down a video?
Well, your iPhone is capable of doing the same thing. The method you use will vary depending on the type of video you wish to speed up.
If you’ve recorded a video using the iPhone’s Slo-Mo mode and want to speed up video on iPhone, you can do so quickly via the Photos app, or else you can carry out the same via Apple’s iMovie app.
With the help of the iMovie app, you can quickly turn live photos into videos. Look at our latest guide about converting live images to video.
Curious to know the detailed guide? Keep scrolling the page and find a step-by-step process to speed up video on iPhone.
If you have an issue with the watermark on your video, check the video watermark remover guide to remove any object from the videos.
Table of Contents
What is iMovie?
Apple Inc.‘s iMovie, or iMovie HD, is a video editing tool preloaded on macOS, iOS, and iPad OS devices.
It got first published in 1999 as a Mac OS 8 utility bundled with the iMac DV, the first FireWire-enabled consumer Mac.
iMovie has been a macOS-only application since version 3 and is part of the iLife suite of Mac products.
In late 2013, iMovie got given away for free with the purchase of a new Mac or iOS device, and it has been available to all customers since early 2017.
iMovie video editor gets aimed at the general public, and Apple also has a product for the professional sector.
2 Easy Ways to Speed Up Video on iPhone

1. How to Speed Up Video on iMovie?
In iMovie, you may change the speed of video clips. The user can also fine-tune the pace of a single clip by separating it into different ranges, each with its tempo.
You could, for example, use different settings to have a clip slow down, then speed up, then slow down again.
Here are the steps on how to speed up video on iPhone using iMovie:
- Tap a video clip in the timeline while your project is open to expose the inspector at the bottom of the screen.
- Press and hold the Speed button. At the bottom of the clip is a yellow bar with range handles on both ends.
- Do one of the following to generate ranges inside a clip:
- Either yellow range handle can get dragged.
- Make a new range, and tap Add in the inspector.
- Push the change up to the right or left in the investigator to boost or reduce the speed. The relative concepts are showcased below the video as you push (2x implies times the average rate, 1/2x indicates half the regular pace, and so on).
- To construct a scope boundary at the play head location, click a portion of the video outside the currently set range or touch Contribute in the investigator to generate a scope boundary at the play head position to build more distances.
- Press the yellow scope grips to adjust the scope, then use the changeup to change the sight. Each region you choose gets represented by a vertical white line at the end of the video. Tap Reset in the inspector to return the entire footage to regular speed.
- To speed up the video on the iPhone process, click anywhere outside the inspector to dismiss it when you get done. By default, iMovie keeps the pitch of speed-up or slowed-down audio clips.
- Go to Project Settings and select “Speed changes pitch” from the drop-down menu. That lets a recorded speech be sped up or slowed down to make it sound louder or quieter.
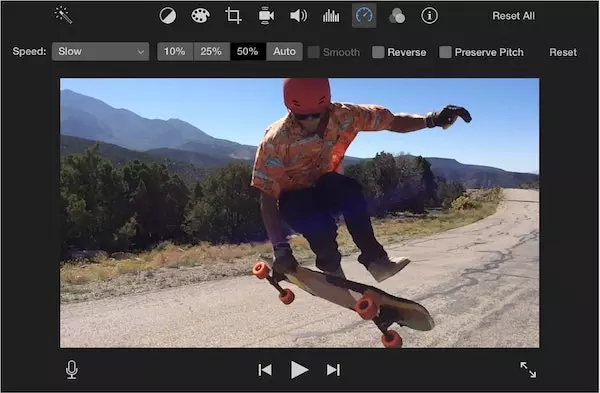
Screenshot from step 1: Tap a video clip in the timeline while your project is open to expose the inspector at the bottom of the screen.

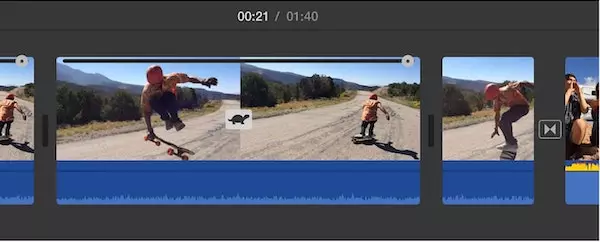
Screenshot from step 6: Press the yellow scope grips to adjust the scope, then use the changeup to change the sight. Each region you choose gets represented by a vertical white line at the end of the video.

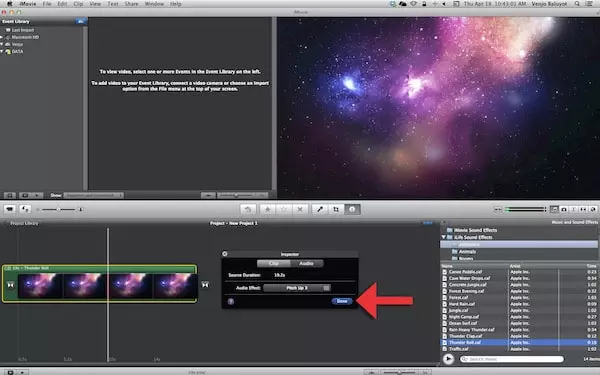
Screenshot from step 7: To speed up the video on the iPhone process, click anywhere outside the inspector to dismiss it when you get done.

Screenshot from step 8: Go to Project Settings and select “Speed changes pitch” from the drop-down menu.

2. How to Speed Up Video on iPhone Gallery?
Using the Photos app, which comes pre-installed on iPhones, is perhaps the simplest way to alter video speed from slo-mo to standard. Your iPhone’s slo-mo films get saved there and can be sped up with the editing tools in Photos.
Comply with the following guidelines to know how to speed up video on iPhone:
- First of all, the users need to activate the Photos application.
- After that, Albums can get accessed by tapping them.
- You can find Slo-mo videos under the Media Types section.
- To increase the pace of a slo-mo video, tap it.
- Now, click on the Edit button once the video is open.
- A set of vertical lines runs along the bottom. These numbers represent the video’s speed at that particular point in the recording. Bars that are relatively close together indicate a regular pace. Lines that far apart suggest slo-mo.
- Drag your finger across the slo-mo portion by tapping the bar with the lines. That will shift all bars to the close-together variant, indicating that they are running at a regular speed.
- To save the video after you’ve modified the speed, hit Done.
Our Thoughts
This is all about how to speed up a video on iPhone. We hope you’ve enjoyed reading the same. You have two options for speeding up a video on your iPhone.
Install Apple’s free iMovie program, which allows you to speed up or slow down any video if you wish to speed up footage recorded at a regular speed.
If you want to speed up a slow-motion video, you can do so in the Photos app on your iPhone, where you can either restore a regular speed or remove the slow-motion section entirely.


