GoDaddy Email, or GoDaddy Webmail, is an email service provided by GoDaddy, a prominent entity in the domain registration and web hosting industry.
This service enables users to generate and setup GoDaddy email accounts associated with their own domain names, providing a heightened level of professionalism compared to standard email services.
Noteworthy attributes include email forwarding, autoresponders, spam filters, and robust security measures.
Users can conveniently access their email through a web browser or configure it with popular email clients using POP/IMAP settings.
GoDaddy Email also enables seamless integration with other services like Microsoft 365, expanding its functionalities to include shared calendars and cloud storage.
With various plans tailored to meet different needs and budgets, this service is advantageous for small businesses, freelancers, and professionals seeking to establish a strong brand identity with a customized email address.
GoDaddy offers extensive customer support for the management and setup GoDaddy email accounts, making it a versatile and user-friendly choice for email hosting.
Table of Contents
Mastering Setup GoDaddy Email: Your Step-by-Step Guide
 Setup GoDaddy email account is so easy. To assist you in getting started, here is a comprehensive guide with step-by-step instructions.
- Purchase a Domain and Email Plan:
- If you haven’t already, purchase a domain from GoDaddy.
- Choose an email hosting plan that suits your needs. GoDaddy offers various plans, including basic ones and others that integrate with Microsoft 365.
- Create Your Email Account:
- Log in to your GoDaddy account and go to the product page.
- Select ‘Email & Office’ and choose the domain you want to use for your email.
- Click on ‘Create’ or ‘Manage’ next to the email plan you’ve purchased.
- Follow the prompts to create your email address. You’ll need to choose an email name (like contact@yourdomain.com) and a password.
- Configure Email Settings:
- Once your email account is created, you may need to configure settings like forwarding, auto-responders, or additional users, depending on your plan and needs.
- Access these settings through the GoDaddy email management dashboard.
- Set Up on Email Clients (Optional):
- If you want to use your GoDaddy Email with an email client (like Outlook, Apple Mail, etc.), you’ll need to set it up using either IMAP or POP settings.
- GoDaddy provides the necessary server settings. These are typically found under your account settings or help documentation.
- Access Your Email:
- You can access your GoDaddy Email account through GoDaddy’s webmail interface or through the email client you’ve to Setup GoDaddy email.
- To access via webmail, go to the GoDaddy website, log in, and navigate to your email inbox.
- Test Your Email:
- Send a test email to and from your new email address to ensure everything is working correctly.
- Customer Support:
- If you encounter any issues or have questions, GoDaddy’s customer support is available to assist you.
Ensure that you frequently review your email settings and regularly modify your passwords to ensure maximum security.
Moreover, to fully leverage the benefits of your GoDaddy Email account, make the most of any extra features available with your plan.
Exploring Godaddy Email Features: A Beginner’s Handbook
Unveiling the wonders of GoDaddy Email can be a captivating journey, particularly for beginners venturing into the realm of professional email setup.
Presented here is a beginner’s guidebook, serving as a compass to navigate through the pivotal features of GoDaddy Email:
- Professional Email Addresses: One of the primary features of GoDaddy Email is the ability to create professional email addresses that match your domain name. This not only enhances your brand image but also gives a more professional outlook to your email communications.
- User-Friendly Interface: GoDaddy Email offers a clean and intuitive webmail interface, making it easy for beginners to navigate, compose emails, manage their inboxes, and organize email folders.
- Email Forwarding: This feature allows you to automatically forward incoming emails to another email address, which is useful if you have multiple email accounts and want to consolidate your emails in one place.
- Auto-Responders: Auto-responders are great for when you’re out of the office or unavailable. You can set up automatic reply messages to let your contacts know when to expect a response.
- Spam Filters and Security: GoDaddy Email includes built-in spam filters and security features to protect your email account from unwanted spam and potential security threats.
- Integration with Other Tools: Depending on your plan, GoDaddy Email can be integrated with other productivity tools. For example, with Microsoft 365 integration, you get access to Office online apps, shared calendars, and more.
- Mobile Access: GoDaddy Email can be configured on your smartphone, allowing you to manage your emails on the go. The service supports both iOS and Android devices.
- Storage and Attachment Limits: Check your plan for storage limits and maximum attachment sizes. This is important to know for managing your inbox and sending large files.
- Contact and Calendar Management: Organize your contacts and schedule them in one place. The calendar feature is particularly useful for setting reminders, appointments, and meetings.
- Customizable Signatures: Create and customize your email signatures. This is a great way to add a professional touch to your emails and provide essential contact information.
- Customer Support and Resources: As a beginner, you might need assistance. GoDaddy offers customer support and has a wealth of resources, such as tutorials and FAQs, to help you navigate and make the most of your email service.
It is crucial to note that the available features may differ depending on the GoDaddy Email plan you choose.
How to Logging into Godaddy Email?

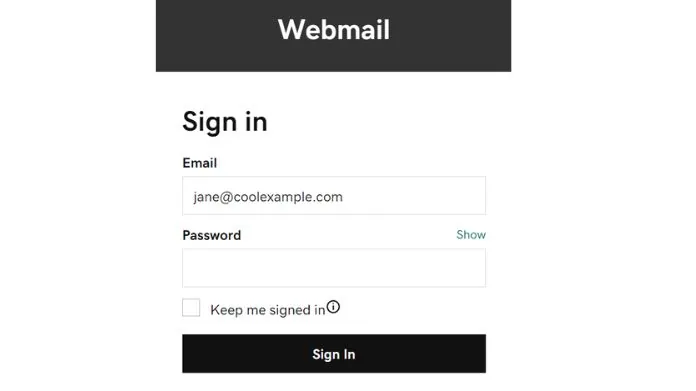
- Access Webmail: Go to the GoDaddy Webmail login page (email.godaddy.com). It’s a good idea to bookmark this page for easy access in the future.
- Enter Your Credentials: Type in your username, which is your email address, and your password. Note that your GoDaddy account username and password will not work here; you need to use your Professional Email or Microsoft 365 email address and password.
- Sign In: After entering your credentials, click on the “Sign In” button to access your inbox.
- Browser Auto-Fill Caution: If your browser auto-fills your username and password, ensure it’s using the correct credentials for your Professional Email or Microsoft 365 account, not your general GoDaddy account details.
- First Time Sign-In: If it’s your first time signing in, you may need to select your timezone and save your preference.
Summing Up
Setup GoDaddy email is both user-friendly and efficient, providing a professional touch to your email communications.
By choosing an appropriate plan, establishing a personalized email address, and configuring it to meet your requirements, you can fully utilize the features and integrations offered by GoDaddy.
With accessible customer service and a variety of online resources, the setup experience is seamless.


